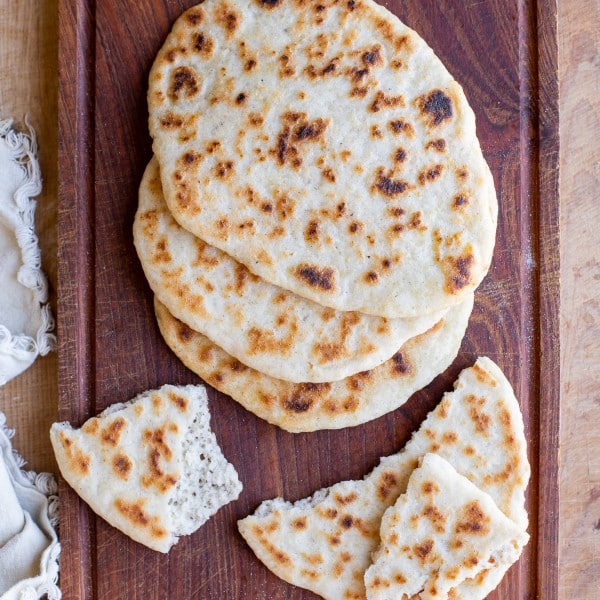
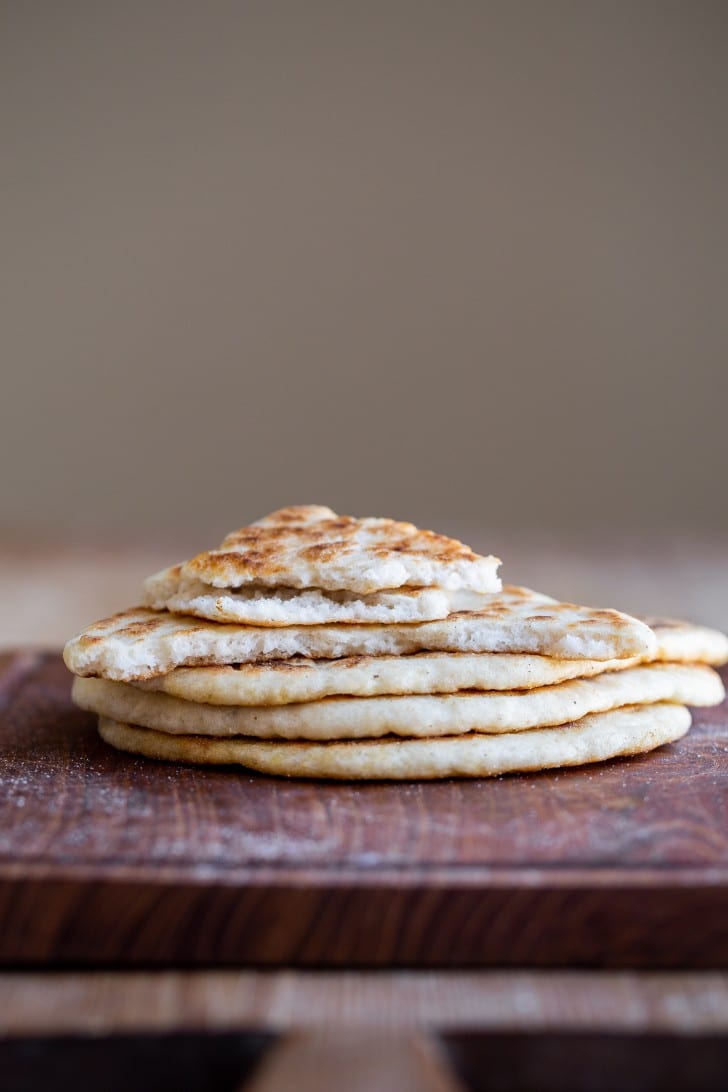
You can make this Fluffy Gluten-Free Flatbread Recipe quickly on the stovetop with just seven ingredients! This recipe works well as a replacement for gluten-free naan bread, gluten-free pita bread, or any other kind of flatbread. Top 8 allergen-friendly.

I’ve dreamed of this kind of gluten-free flatbread for years. I’ve mourned over my inability to eat naan bread when at Indian restaurants, and been so sad to order a falafel salad instead of the wrap because no pita for me. I truly, truly cannot believe it’s taken me this long to recreate the gluten-free naan/pita/flatbread goodness I’ve been missing for so many years.
This gluten-free flatbread makes for the perfect gluten-free pita to wrap up your kebabs, the perfect gluten-free naan (also vegan!) to scoop up your curries, and works well to wrap up anything you’d want to fill it with. It’s…
- Chewy and soft
- Sturdy enough to hold all your fillings
- Bubbly and fluffy
- Only 7 ingredients
- Gluten-free, vegan and nut-free
- Absolutely delicious
Pssst – if you like this recipe, you’ll love all of these gluten-free bread recipes, too!
What ingredients do I need?
- Active Dry Yeast: this gives us those beautiful bubbles to lighten and leaven this flatbread.
- Raw Cane Sugar: not for sweetness, this sugar is just here to feed the yeast.
- Filtered Water: to activate the yeast & hydrate the psyllium!
- Psyllium Husk: don’t skip this – it makes the dough easy to work with and gives the flatbreads a nice chew. If you’re using psyllium powder, use 75% of the amount called for.
- Brown Rice Flour: this is what I tested with, but white rice flour, sorghum flour, or another favorite mild-flavored grain flour will also work.
- Potato Starch: you can use any other starch here too, like tapioca flour or arrowroot starch.
- Sea Salt: because no recipe is complete without it!
How to make gluten-free flatbread:
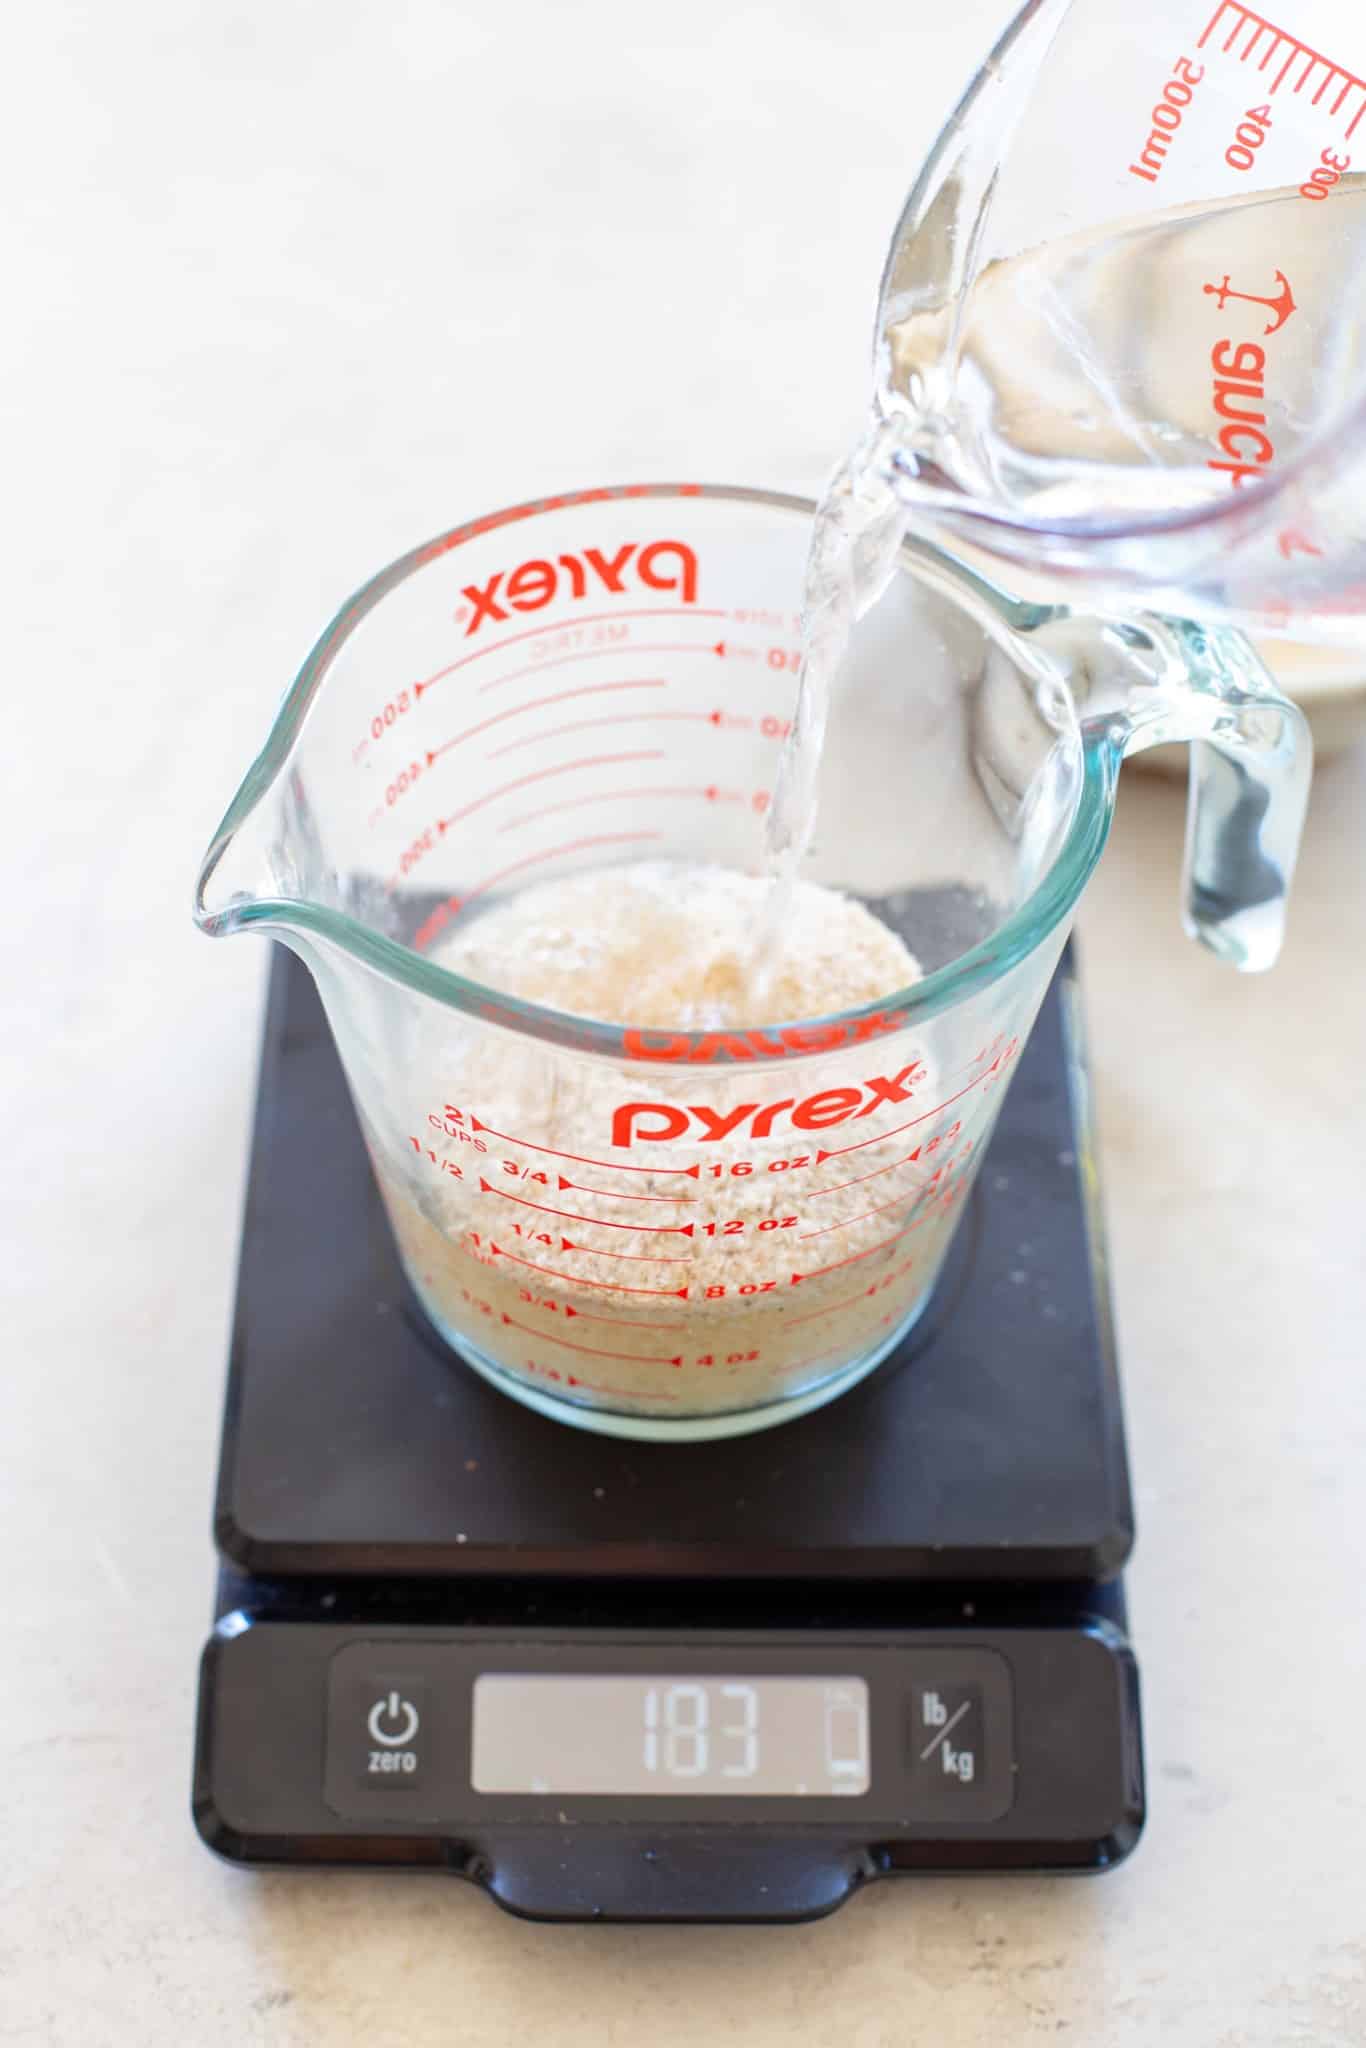
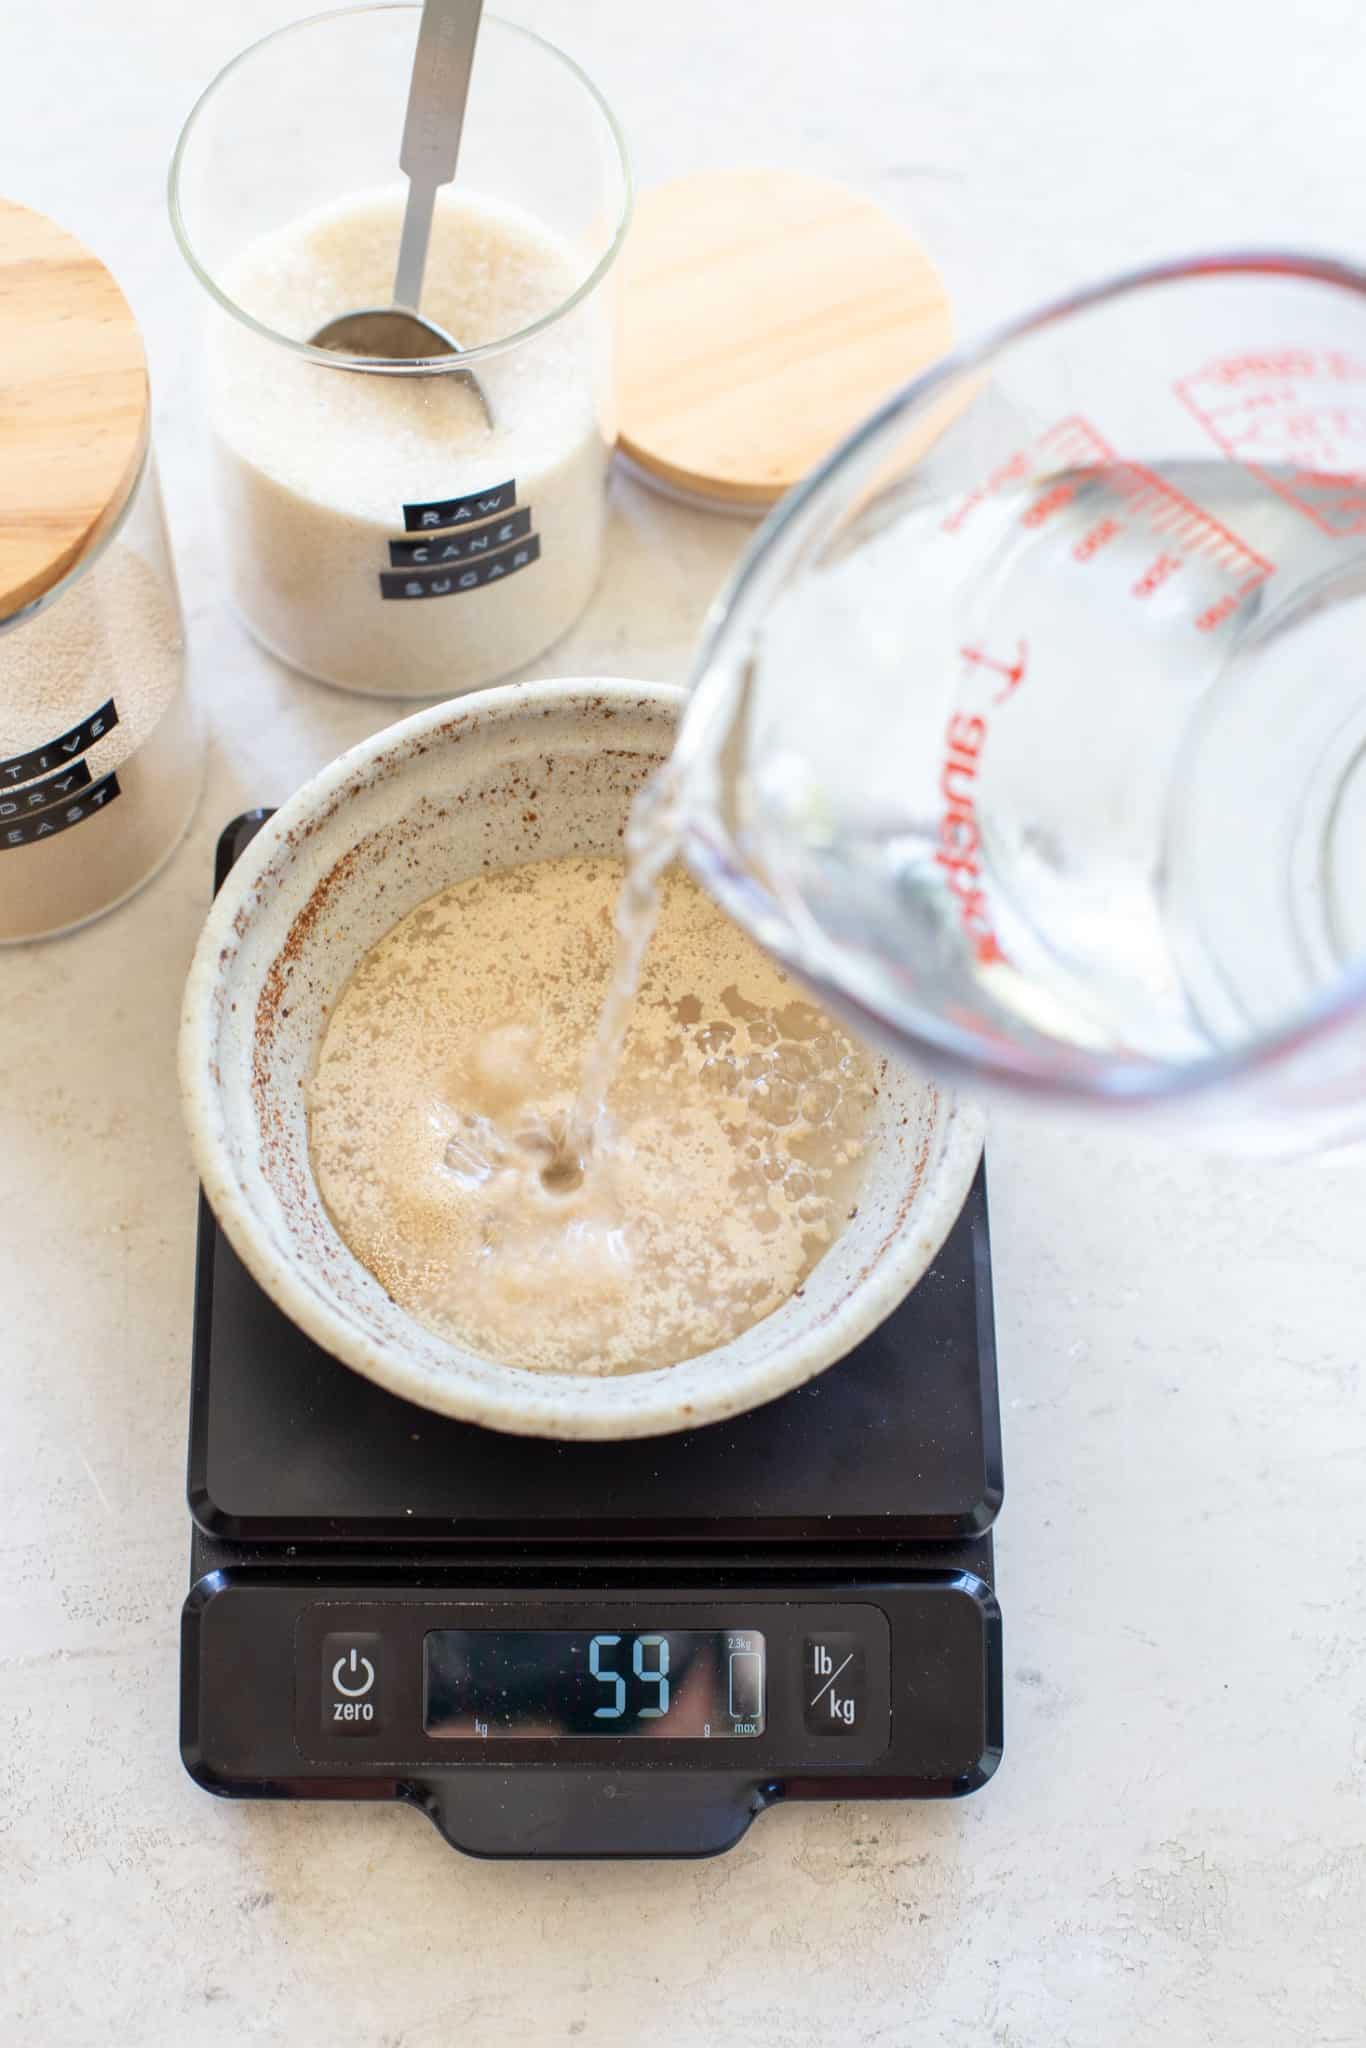
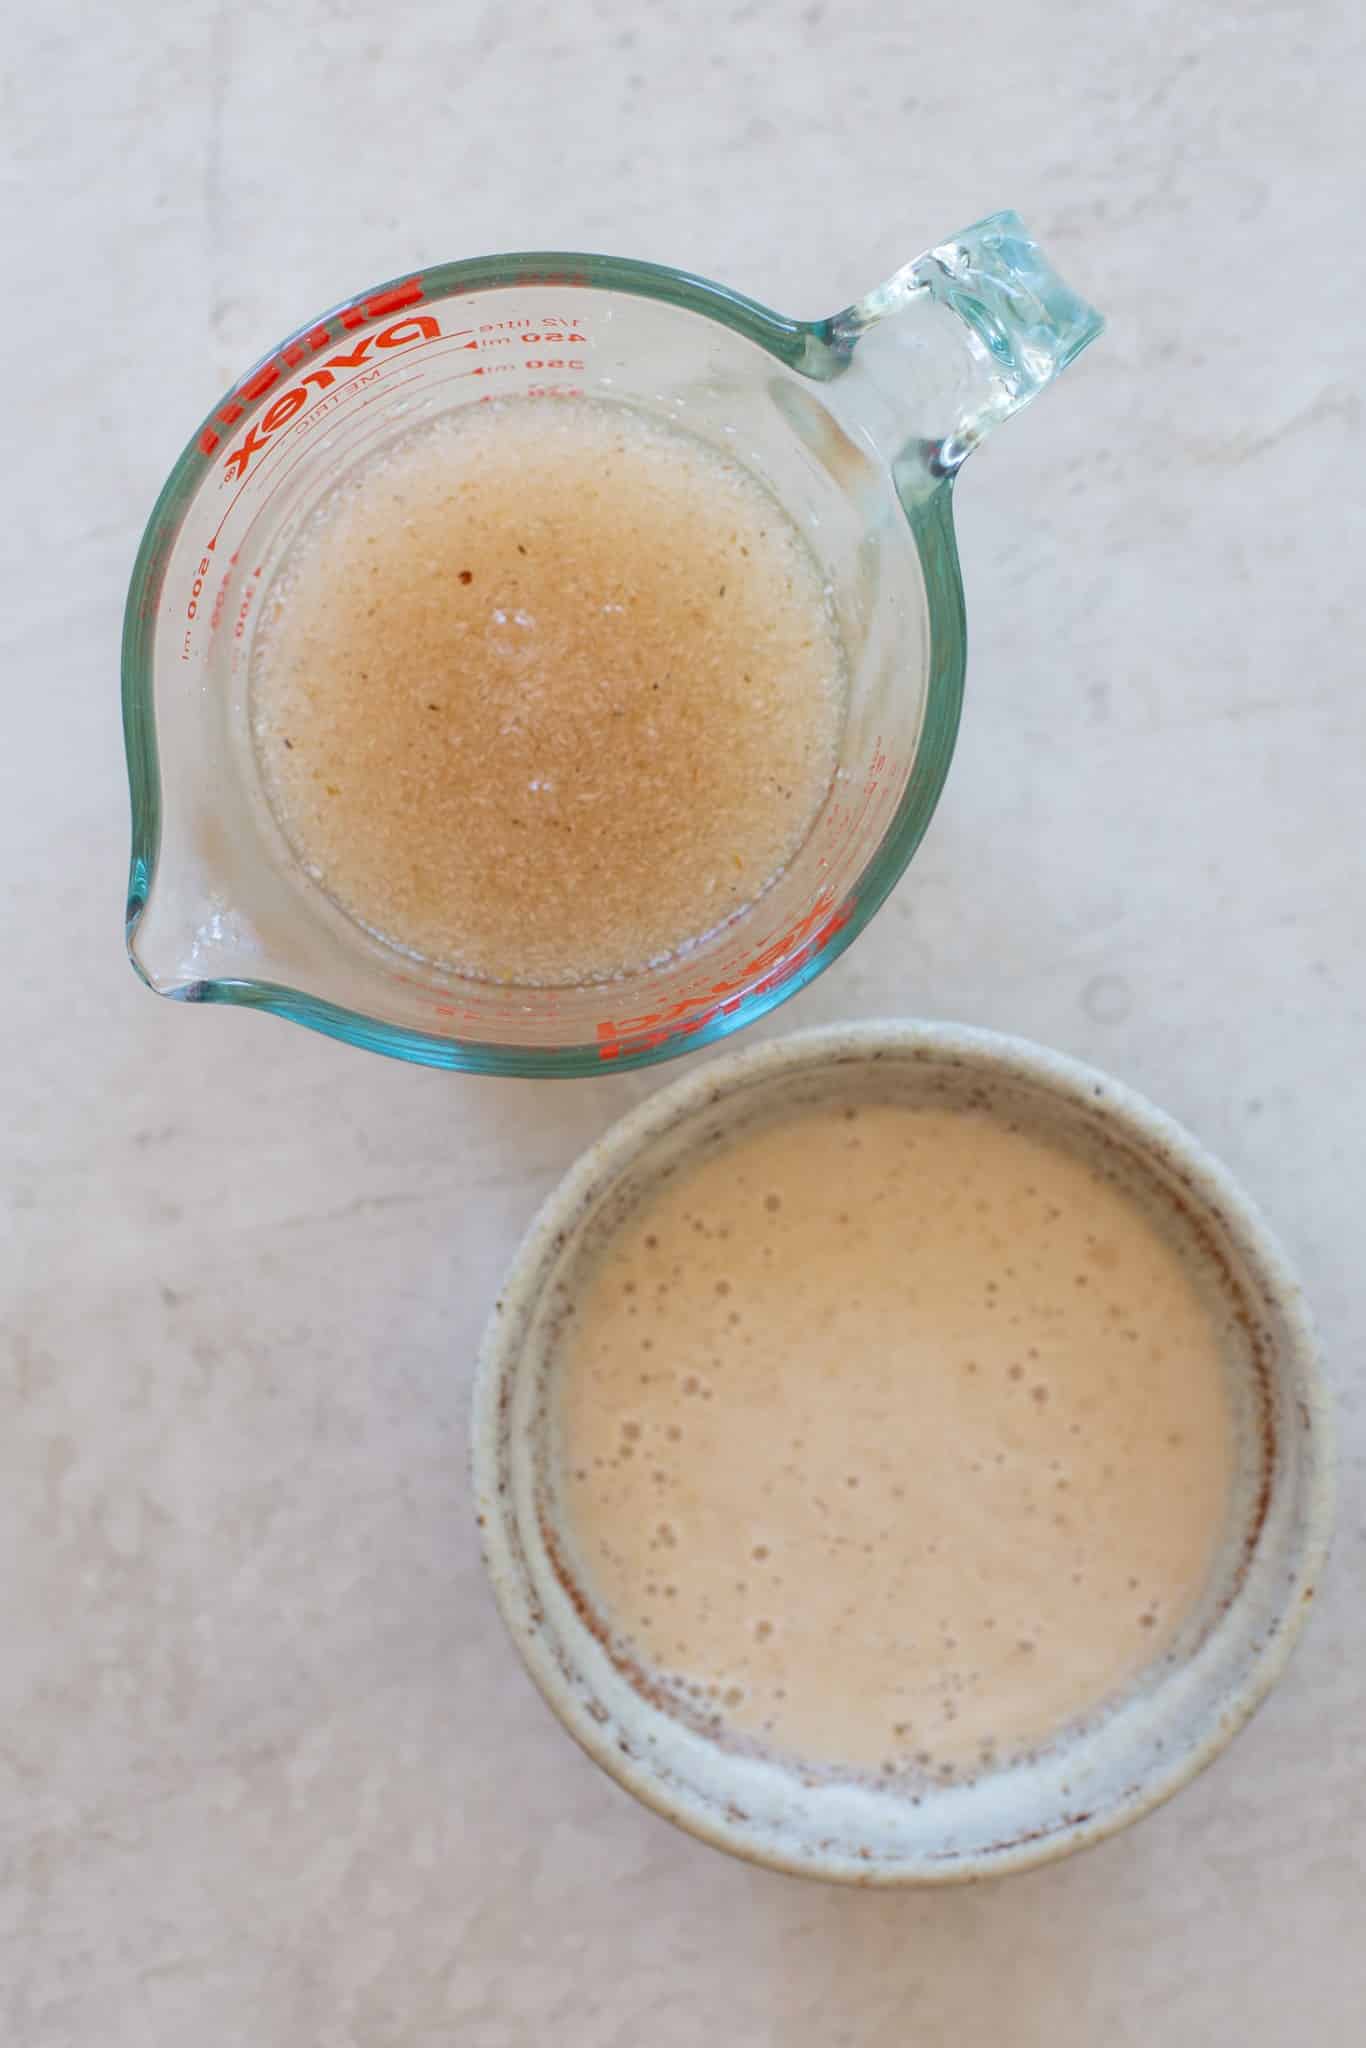
Step 1: Begin by activating the yeast with the sugar and warm-hot water (it should be hot to the touch, but not so hot you can’t hold a finger in it — think hot bath temperature). While it activates, combine the water and psyllium husk and let gel.
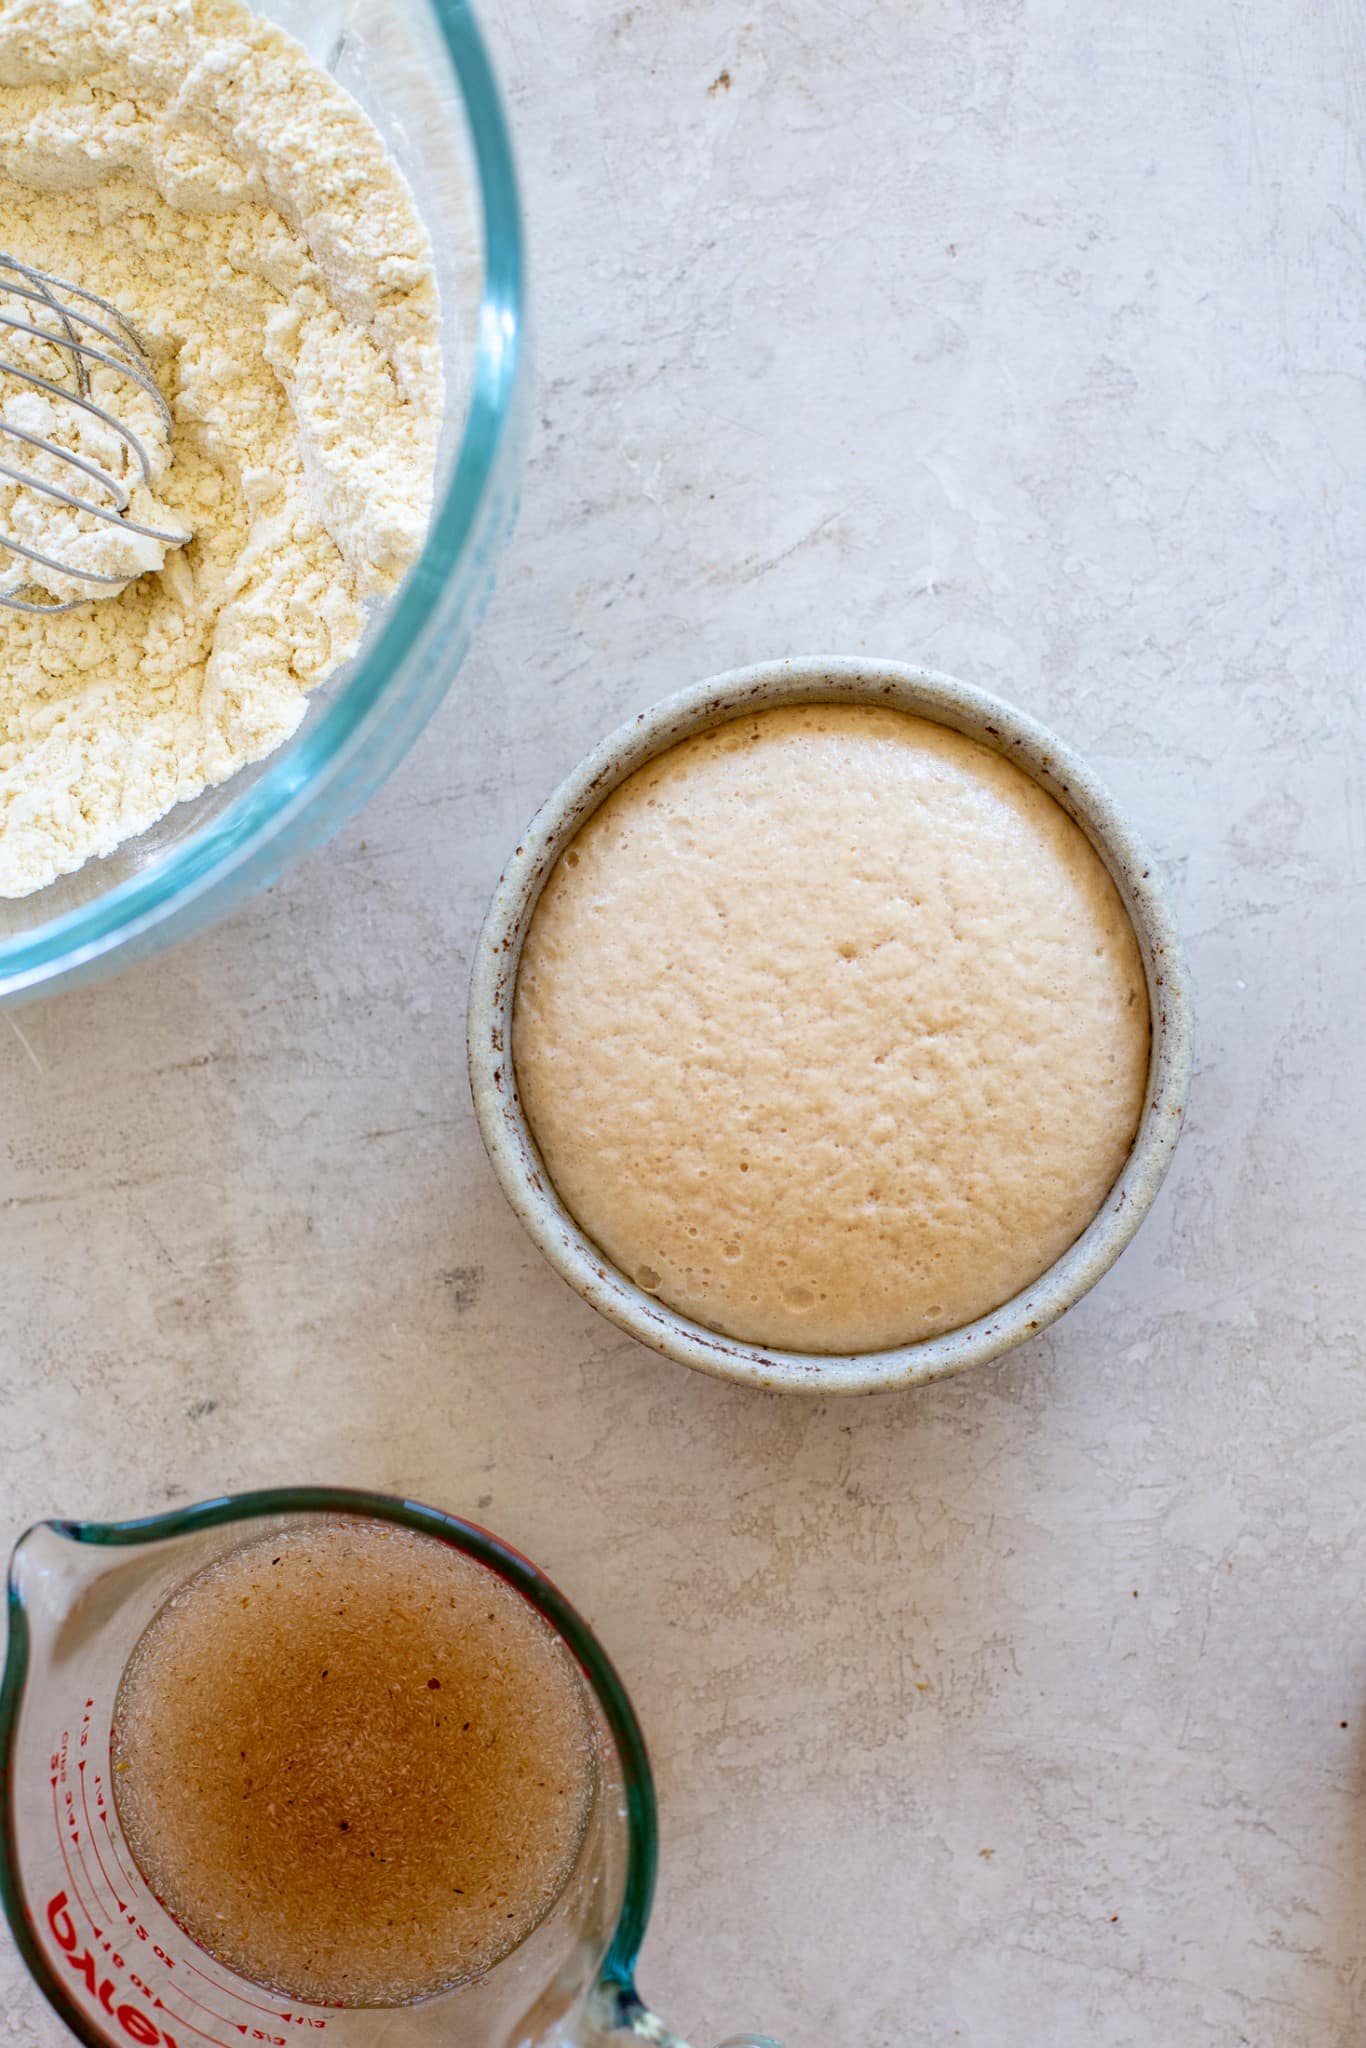
Step 2: In a mixing bowl, combine the brown rice flour, potato starch, and salt. Whisk to combine, and then add in the activated yeast and psyllium husk mixtures.

Step 3: Use a dough whisk or a stand mixer to mix the dough until completely combined.
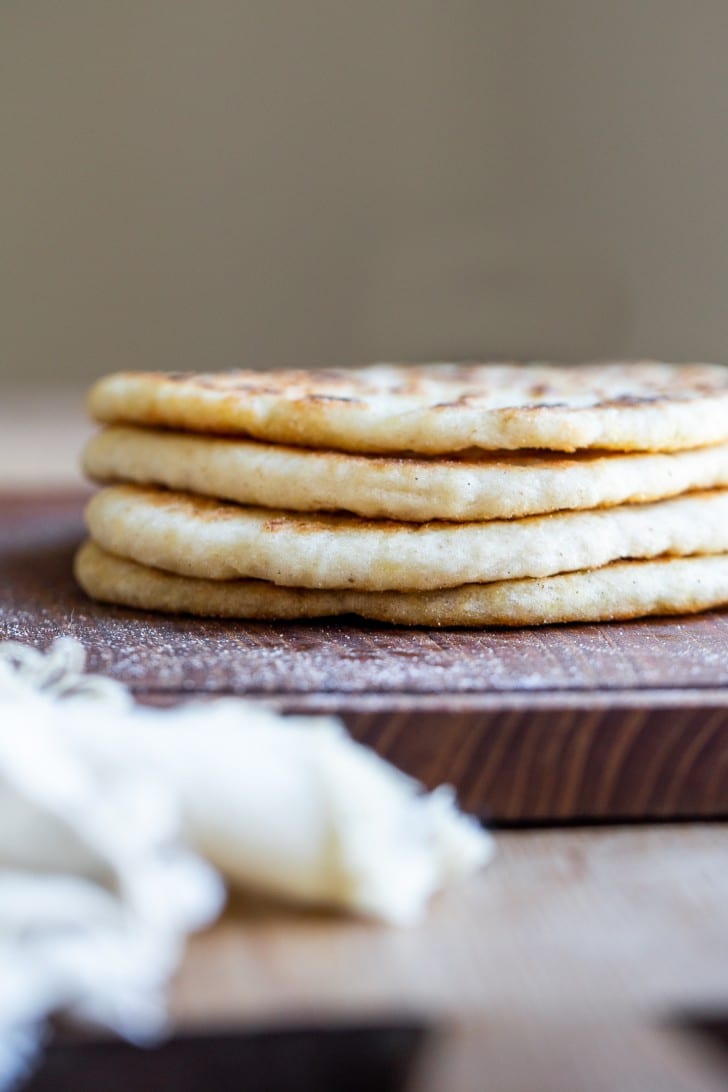
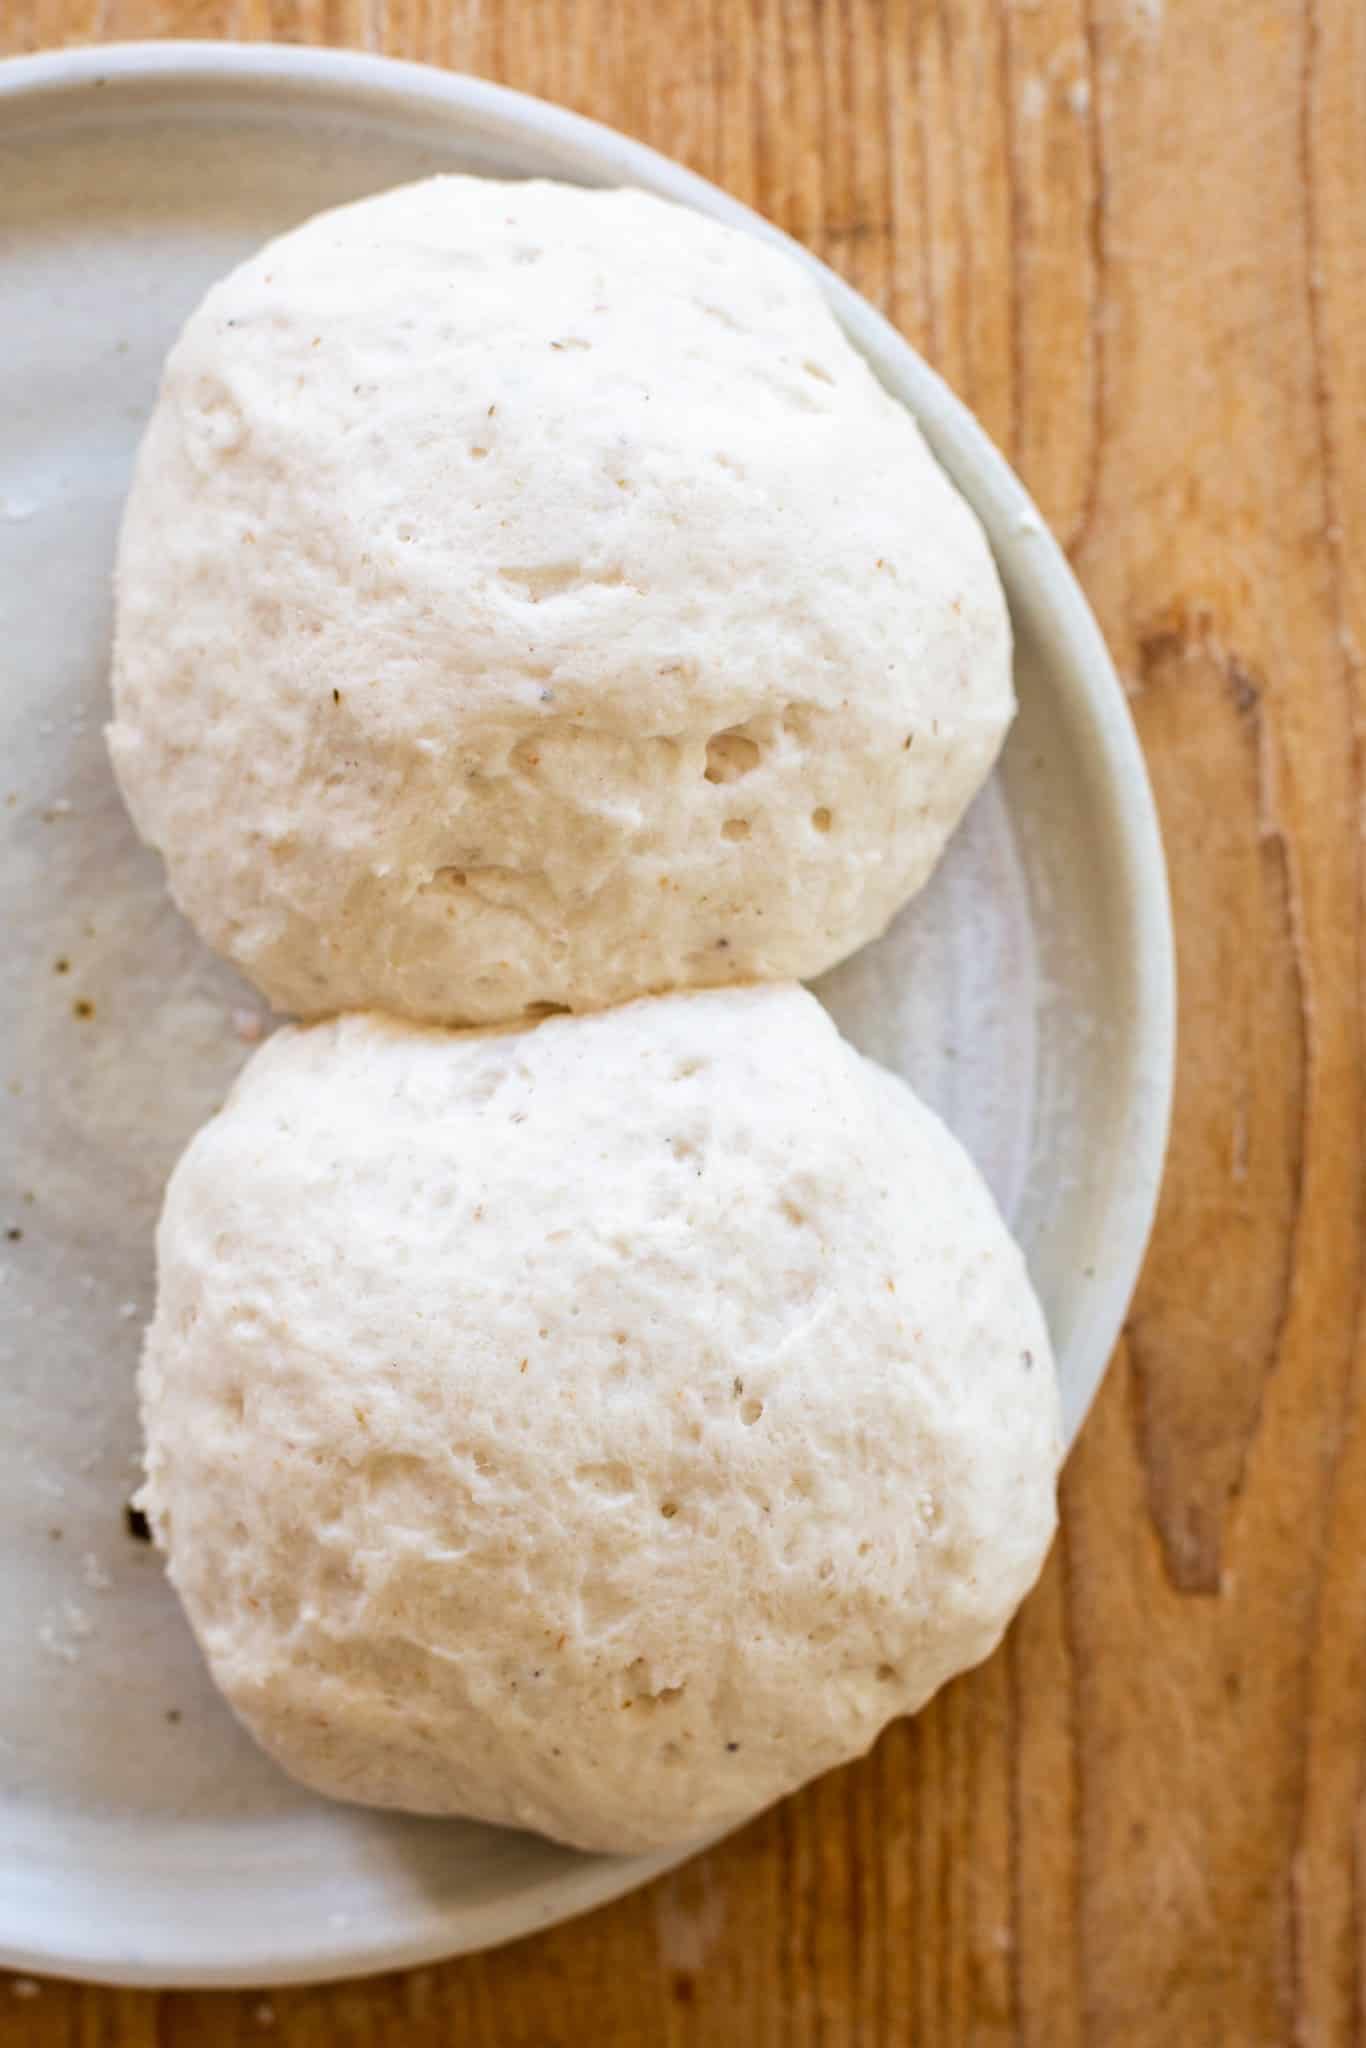
Step 4: Divide into four equal pieces and let rise for one hour. They’ll just about double in size.
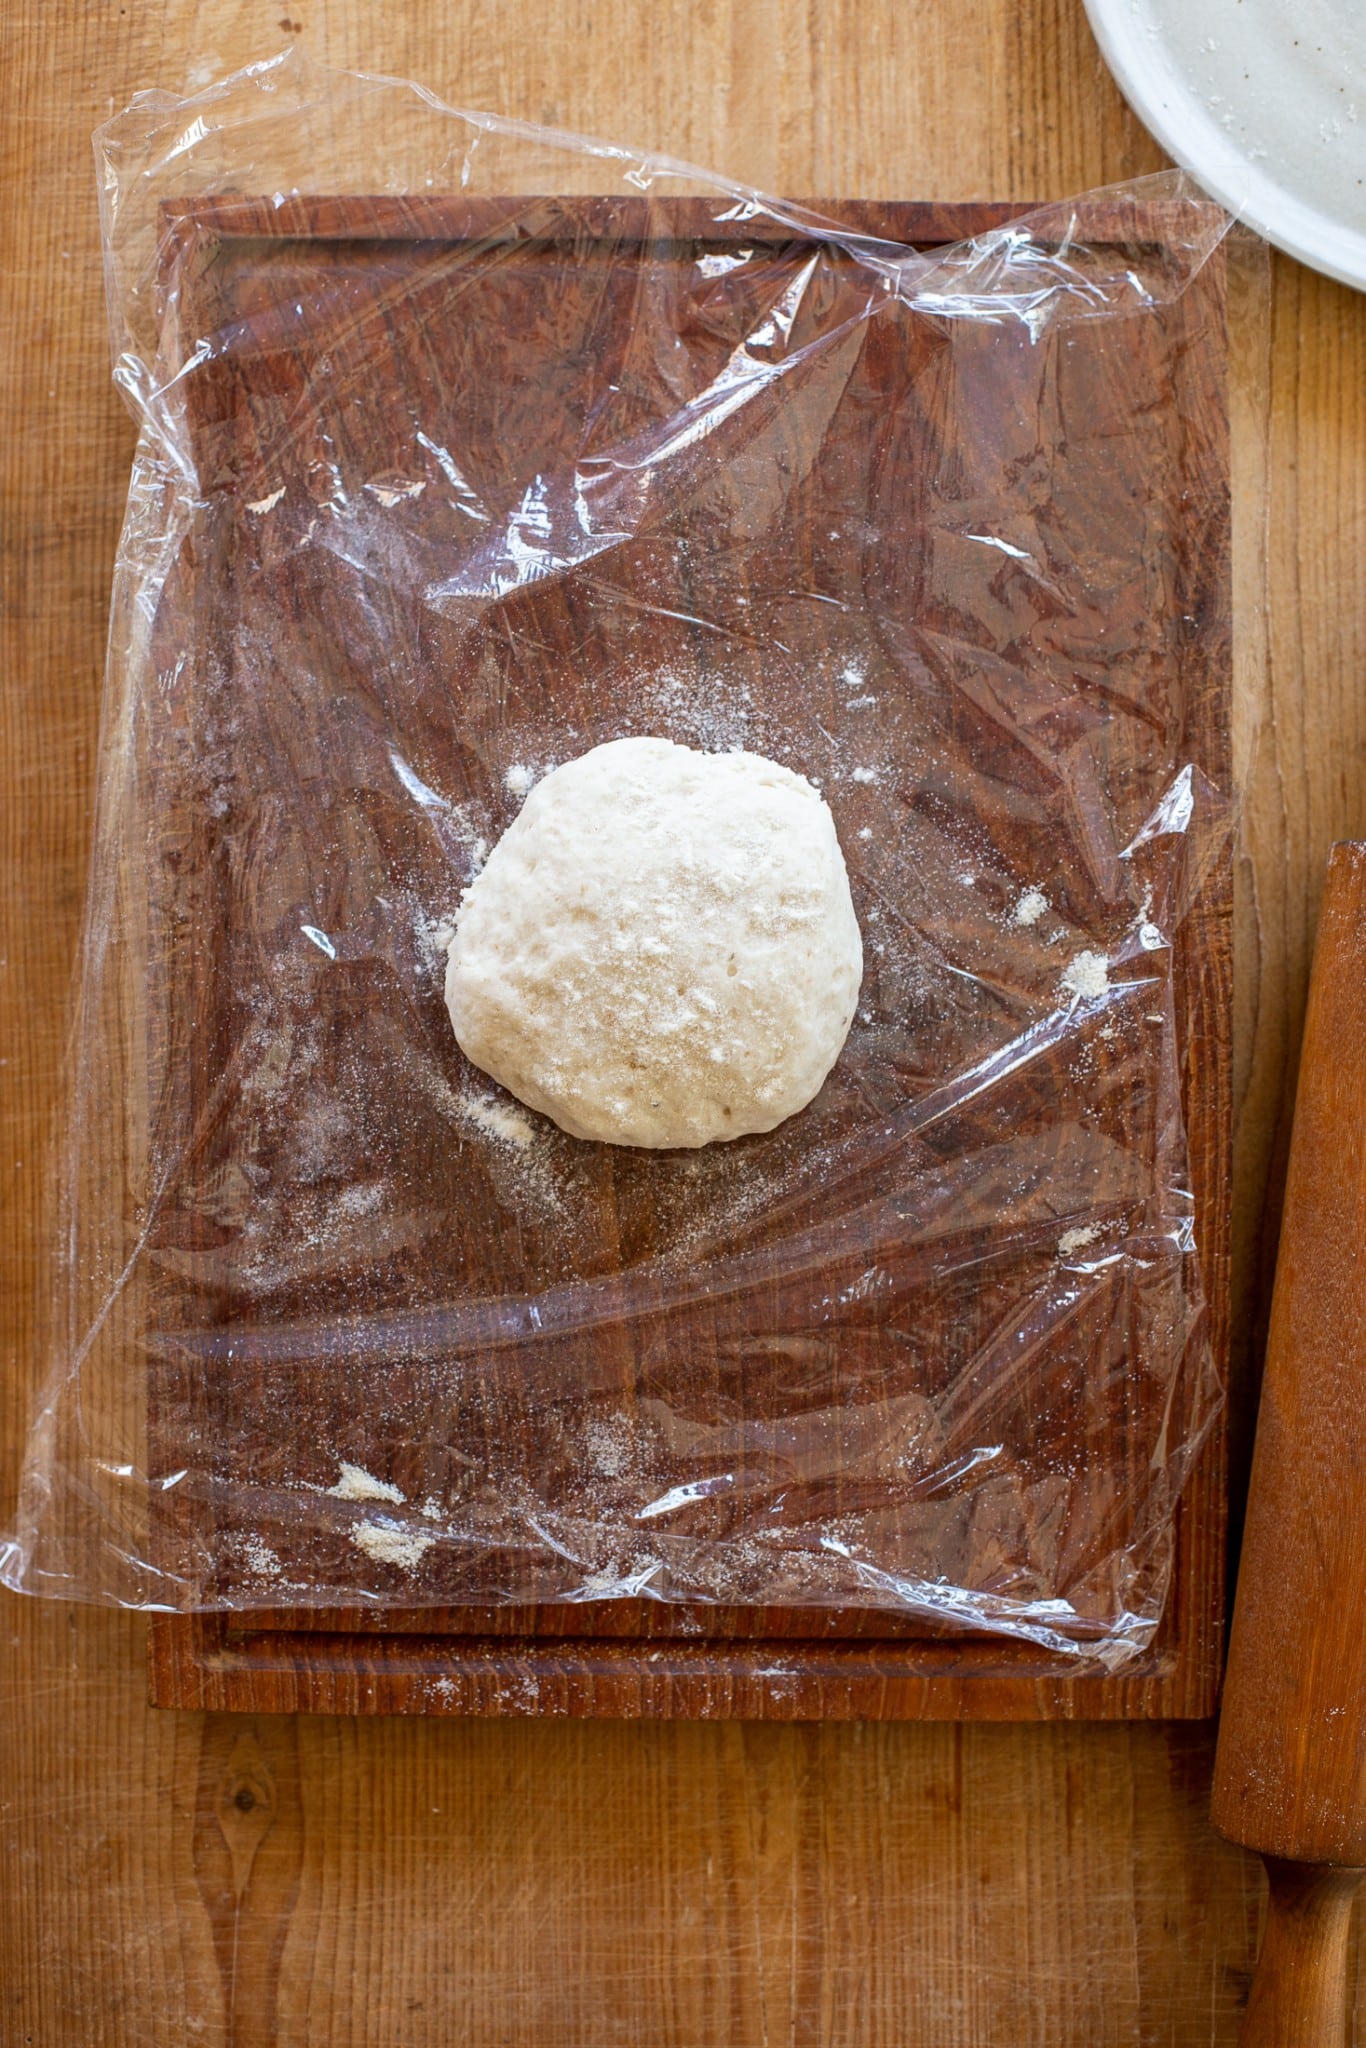
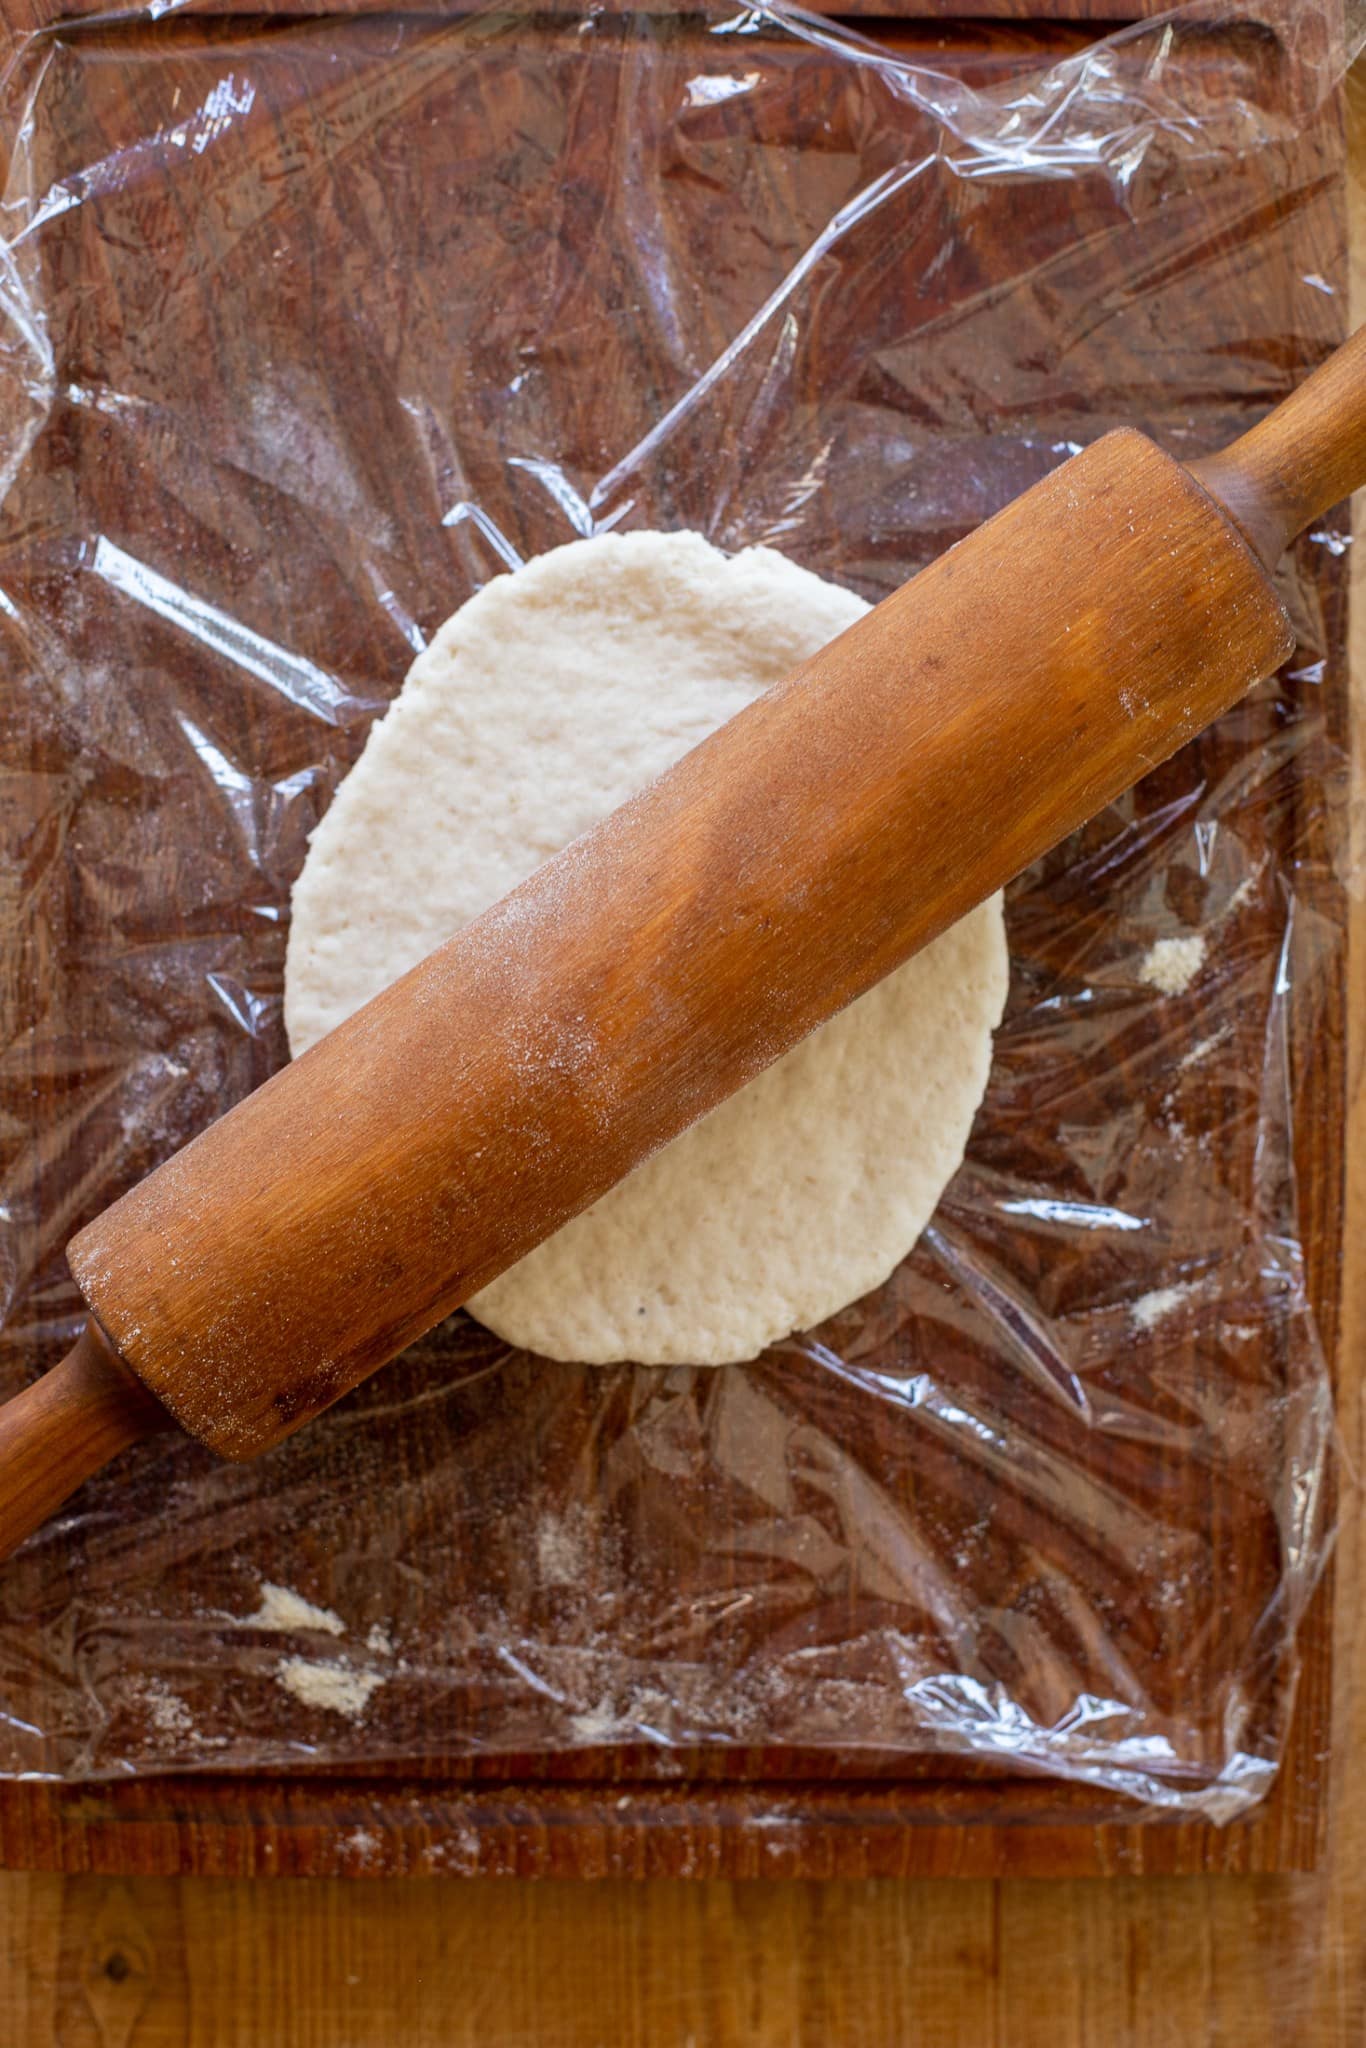
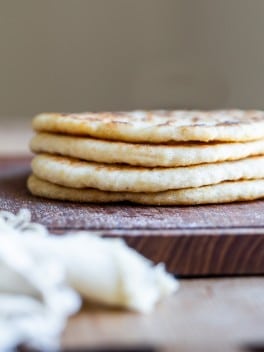
Step 5: Roll out each flatbread. I like doing this on a piece of lightly floured parchment. I do one at a time, and as one cooks, I roll out the next one.
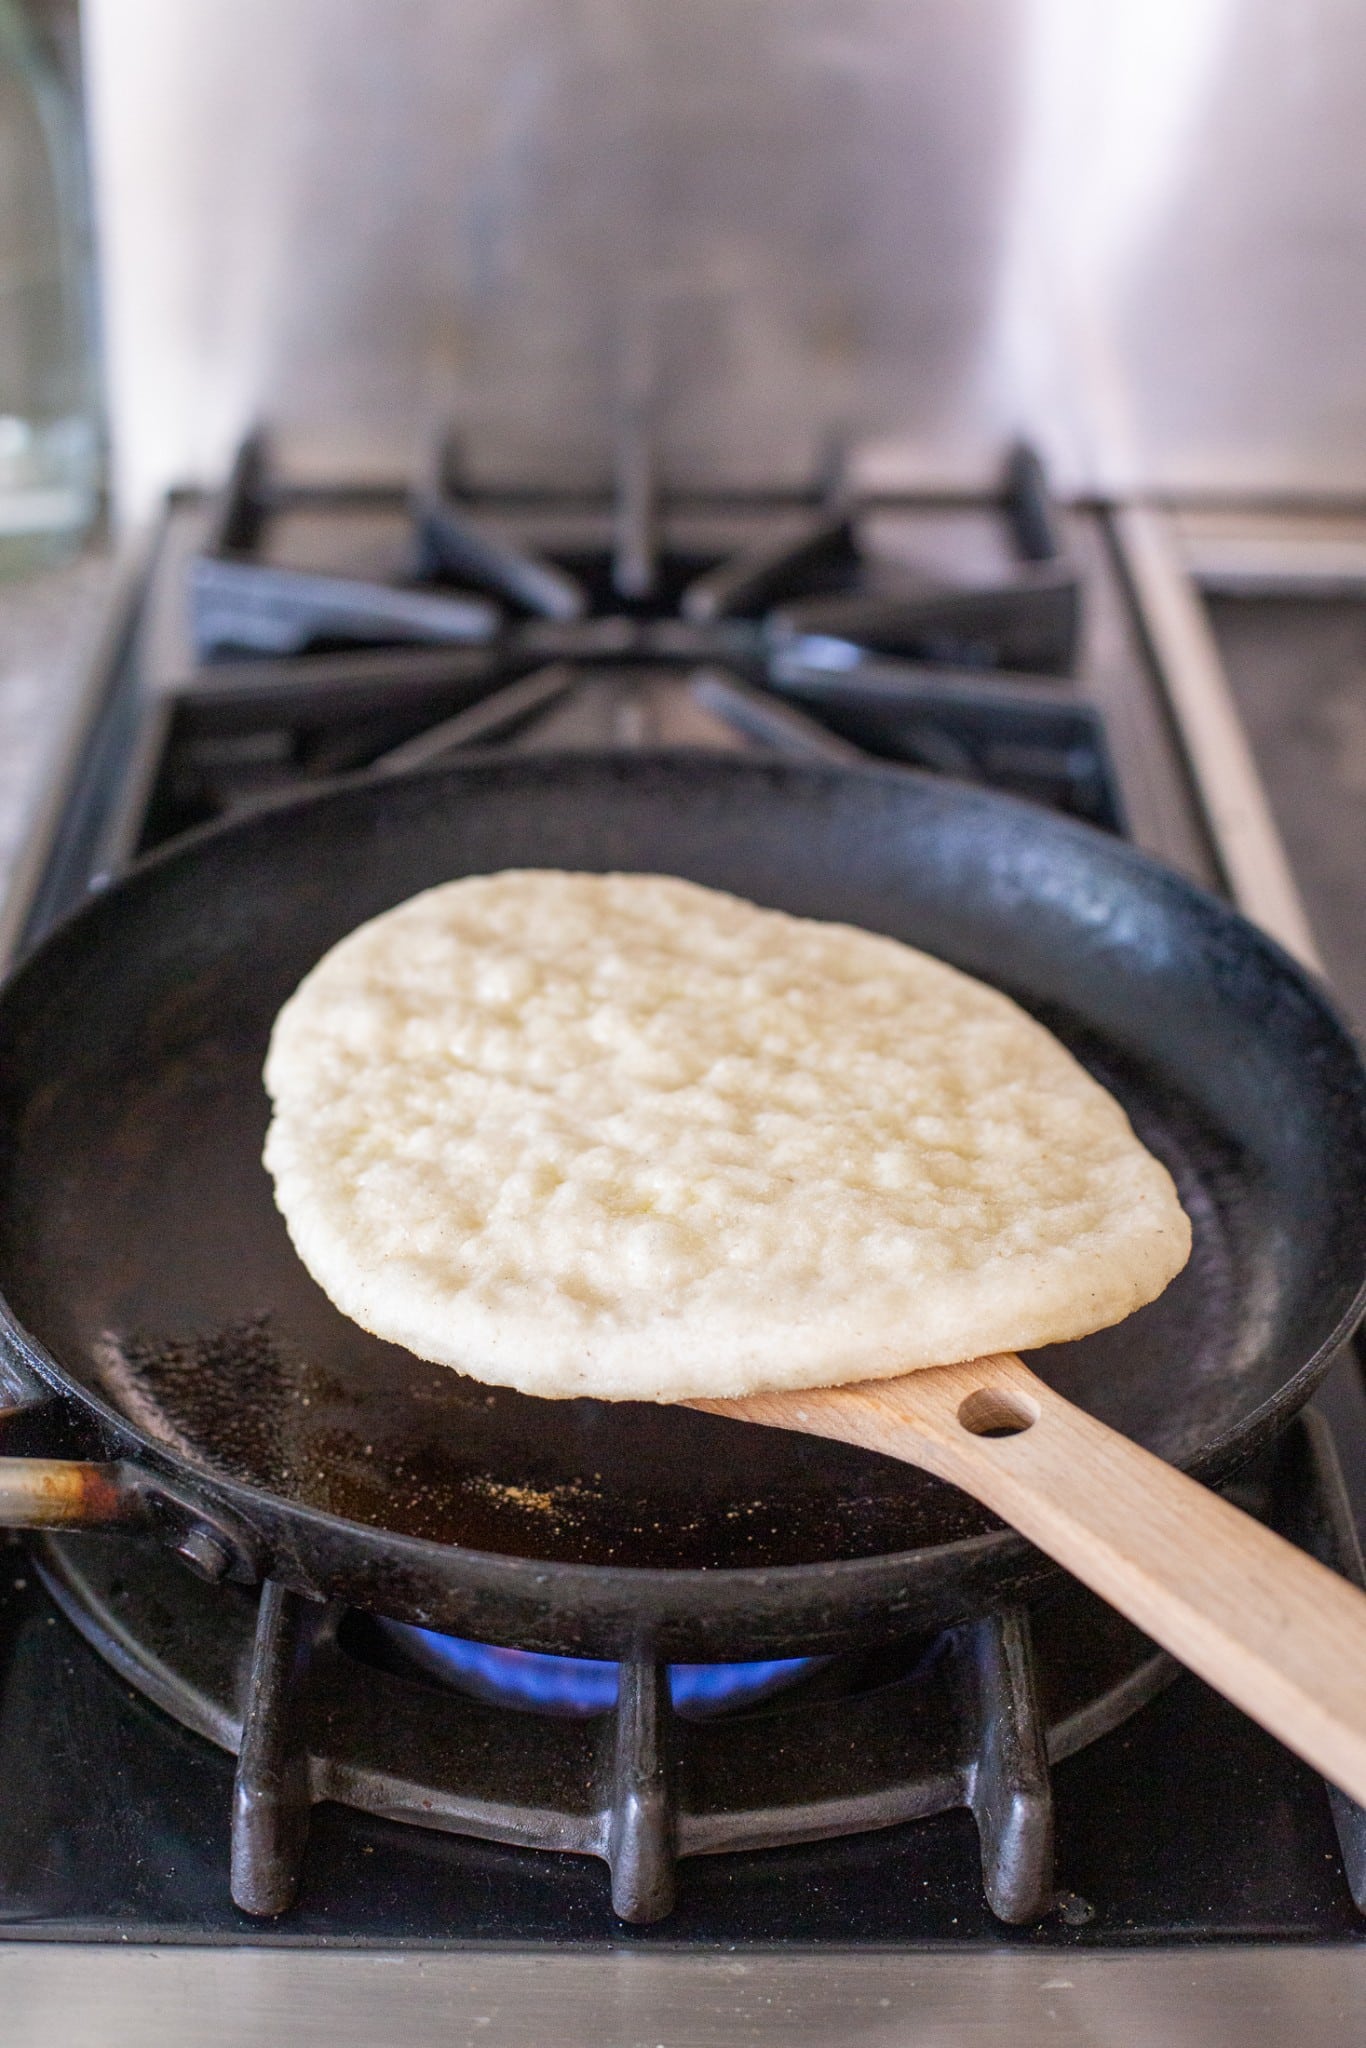
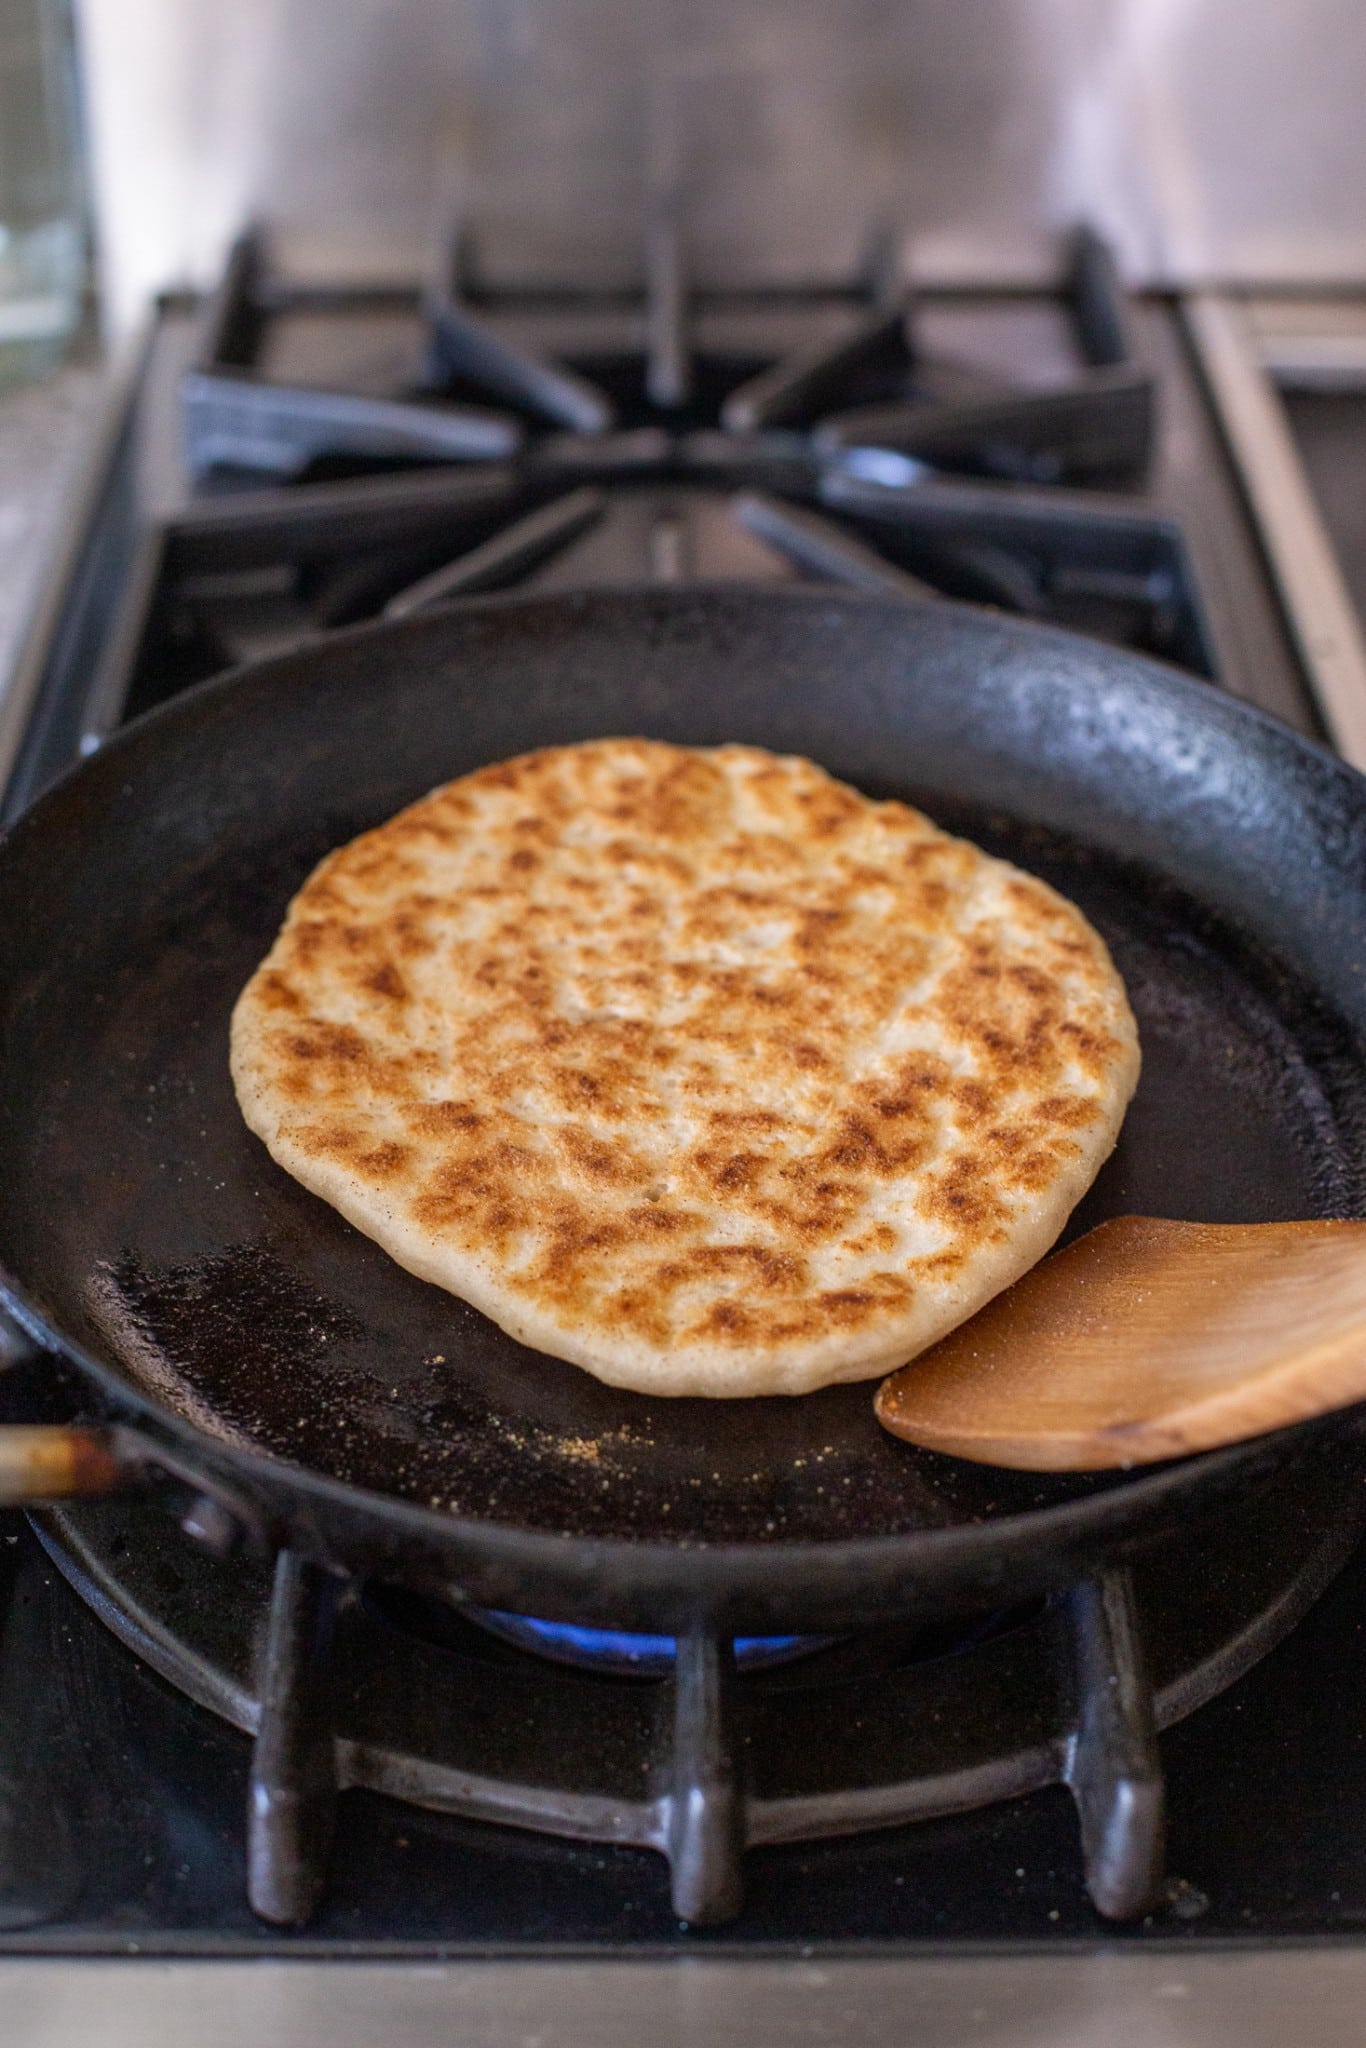
Step 6: To cook each flatbread, heat a non-stick pan over medium-high heat. Add a little bit of oil to the pan and place the flatbread on top. Cook for 3-4 minutes on each, brushing the top with oil before you flip it over. It should bubble and get browned. Repeat until all flatbreads are cooked!
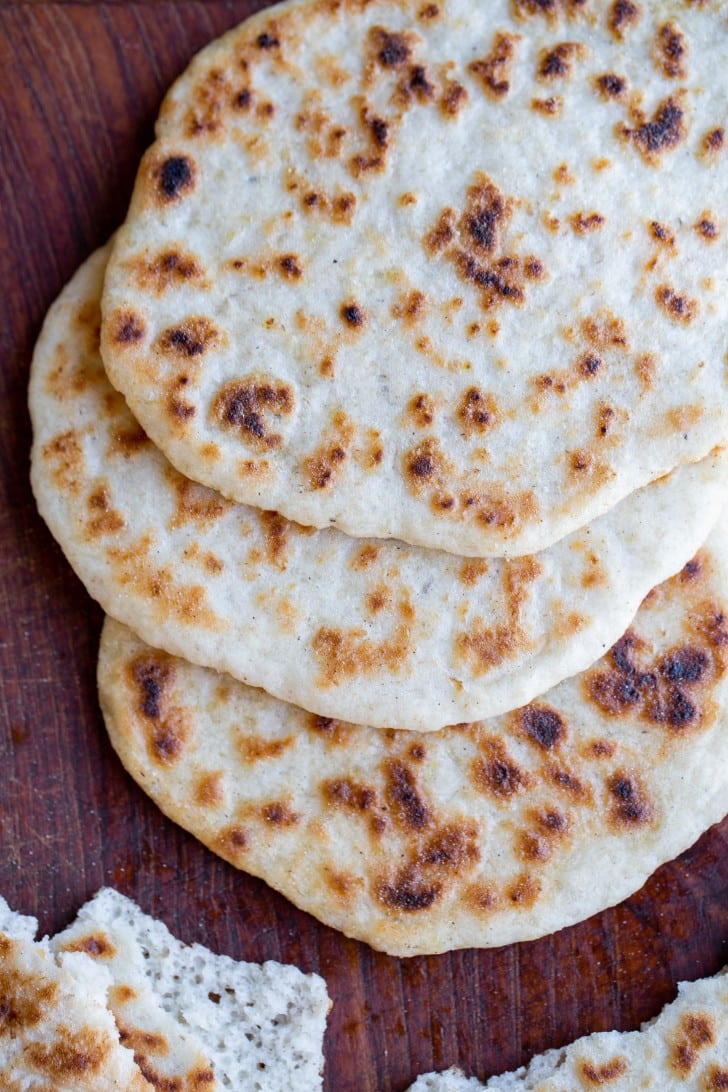
Step 7: Serve warm with your favorite soup or curry! You can reheat leftovers in the toaster for a few minutes, or over the stove with a lid.
Can I flavor this gluten-free flatbread?
Yes, absolutely! Although not entirely traditional, I love making this into a “gluten-free naan” with garlic on top, but you can add so many different flavors and fillings. Here’s some of my favorite ways to add flavor to these gluten-free flatbreads.
- Combine melted butter (vegan if needed) and minced garlic in a bowl, and brush on top of the warm flatbreads for a gluten-free garlic naan. Garnish with herb of choice.
- Mix herbs and/or spices into the dough before cooking.
- Add cheese (vegan if needed) into the center of the dough ball before rolling it out for a cheese-filled flatbread.
- Add very thinly sliced onions into the dough for a gluten-free onion flatbread.
Can I make these flatbreads ahead of time?
They’re best when fresh off the stovetop, but they can definitely be made ahead of time if you prefer.
To prep ahead: prepare the flatbreads all the way through cooking, let cool, and store airtight in a ziplock plastic bag in the refrigerator until ready to use.
To reheat: Place on a pan over medium-low heat. Cover with a lid and cook for 1 to 2 minutes. Add a few drops of water to create steam to help refresh the flatbreads.
What to serve gluten-free flatbreads with…
Fluffy Stovetop Gluten-Free Flatbread
Ingredients
To activate the yeast
- 3 g active dry yeast
- 10 g raw cane sugar, maple syrup or honey works too
- 60 g filtered warm water
For the flatbreads
- 10 g whole psyllium husk, to use ground psyllium husk, use 8g
- 190 g filtered water
- 130 g brown rice flour
- 80 g potato starch, can also use arrowroot or tapioca starch
- 4 g sea salt
- Olive oil, to cook the flatbreads
Instructions
- In a small bowl, combine the yeast with the sugar and warm water, between 100-110℉. It should feel warm, but not hot, to the touch. Let it sit to activate for about 10 to 15 minutes. You should notice it start to to bubble, and then it will get nice and foamy on top.3 g active dry yeast, 10 g raw cane sugar, 60 g filtered warm water
- In a bowl or liquid measuring cup, mix together the psyllium husk and water. Whisk together, breaking up the psyllium, and let it set for a few minutes until it’s thickened and gel-like.10 g whole psyllium husk, 190 g filtered water
- In a large mixing bowl or the bowl of your stand mixer, mix together the flour, starch, and salt. Whisk to combine.130 g brown rice flour, 80 g potato starch, 4 g sea salt
- Add the psyllium gel and the activated yeast mixture to your dry ingredients. Add any herbs or spices right now if desired.
- If using a stand mixer, fit it with the dough hook and let it mix up the dough until combined and smooth, scraping down the sides a few times during the process, and flipping the dough around to make sure it’s fully mixed on the bottom too. You can also do this by hand. If doing it by hand, I like using a dough whisk to get it mostly combined. Then, turn it out onto the countertop and use your hands to knead the rest of the flour in.
- Divide into four equal pieces and place on a plate or baking sheet. If you’re impatient, you can cook these up immediately but they’ll be a lot less fluffy. Cover, and let rise for one hour. They should just about double in size.
- Once doubled, roll each flatbread out on a lightly floured surface to the desired thickness – they’ll puff a bit as they cook too.
- Heat a pan to medium-high heat and brush with a bit of olive oil. Cook one flatbread at a time over medium heat for 3 to 4 minutes on each side, until golden brown. Repeat until all are cooked.Olive oil
- Serve warm, or store in the refrigerator until ready to serve. To reheat, place on a pan over medium-low heat. Cover with a lid and cook for 1 to 2 minutes. Add a few drops of water to create steam to help refresh the flatbreads.

I made these and they are really delicious! Thank you so much for the recipe. I can’t wait to enjoy these in all sorts of ways – with hummus, as a wrap, etc. The GF and non-GF members of the family all enjoyed these!
So glad they were a hit!! Thanks so much for the feedback, Heather :)
I saw you pop up on the gram sharing this recipe and I was like ‘I am soooo making them tonight!’ And I did!
They’re AMAZING and so easy! Both my kids scoffed them down and they’re more critical than Gordon Ramsey!! I made six smaller flat breads so I have some left for me to graze on!
Mine turned out great even though they had over two hours proving time! I was distracted watching the events out of Buckingham Palace.
I will DEFINITELY be making these again!
Thank you
So glad they were a hit all around, Marsha!! :D thanks so much for the feedback!
I followed the recipe exactly and OMG. Soooo good! My yeast didn’t double in the first phase but my dough still rose once it was all mixed. This is probably the best textured gf flat bread I’ve ever had! Thank you!
I am SO happy to hear you’re loving it, Nina!! Thanks so much for the feedback :D
Hello
Can I bake this bread in the oven.
If so, how long and what temp. ?
Thanks
Hi Vilma, I haven’t tried baking these in the oven so I’m not positive, but I would try baking for about 10 minutes at 425 or 450 degrees F!
Thanks for this recipe! How would I adapt it to your sourdough starter instead of active dry yeast, please? :)
Working on a sourdough version but haven’t perfected it yet, so unfortunately I can’t share the perfect sourdough flatbread just yet :)
Hi Rachel, Can’t wait to try !! Is there an easier way to print recipes, or do I have to go through download???
Hi Joyce, if you look at the recipe card, you should see a button that says “print recipe” that will take you to a page formatted for printing!
We are not eating rice, what can I use instead of rice flour? Can I use quinoa flour? I plan to use arrowroot starch/powder since I can’t have potato stuff.
H Bernie! If you read through the “ingredients” section in the body of the post you’ll see these questions answered. I wouldn’t recommend quinoa flour because on it’s own it’s pretty bitter, but other whole grain GF flours will work.
This is the best gf bread I have ever tried. Thank you so much, I feel complete! Everyone should have this in their repertoire for their gf needs.
Woohoo! The best compliment :) thanks, Kirstin!
A couple of things I want to share about this yummy, game changing recipe.
I made a double batch one evening and put the raw dough balls into a container in the fridge. In the morning, I used my tortilla press (lined with a ziploc bag cut to be like a manila folder) to press out a flatbread in like 3 seconds, and cooked it as i scrambled my eggs. It worked perfectly and was quick as well as zero mess.
It is so, so nice to have soft and very fresh bread for my breakfast. Thank you again.
Wow brilliant!! Thank you SO much for sharing these tips, Kirstin!
Can’t wait to make these! Did you use ground psyllium husk powder or whole psyllium husks?
Hi Ally! I used whole psyllium husks for this recipe. If you want to use ground psyllium, you’ll use 80% of the called-for amount, so 8g in this case. I added this info to the recipe card also!
love your recipes, any chance of getting the measurements in other measures e.g., tablespoons, teaspoons, cups, etc.?? Many Thanks,
Hi Faith! Exact measurements are super important for gluten-free bread which is why I provide all measurements in grams. You can find a baking scale for under $10 (here’s one I like) and it will ensure you get great consistent results. Definitely worth the investment if you bake with any regularity!